Passport Photo Lighting Requirements (2026 Guide)
Last Update: February 24, 2026
Taking your own passport photo at home is totally doable, but lighting is where most people go wrong. If the lighting isn’t right, your photo can easily get rejected, even if everything else looks fine.If you understand basic passport photo lighting requirements, you can take a compliant photo at home without needing a studio.
For full official rules, see our complete guide to passport photo requirements.
Why Lighting Matters for Passport Photos
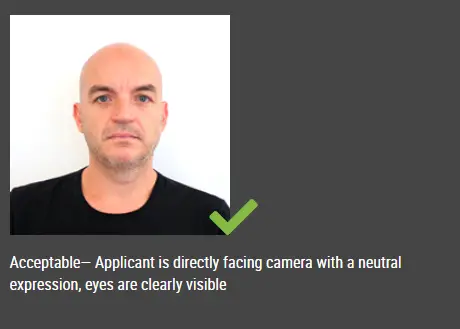
Passport photos aren’t about looking your best, they’re about being clearly recognizable. That means your face needs to be:
-
Evenly lit
-
Free of shadows
-
True to your natural skin tone
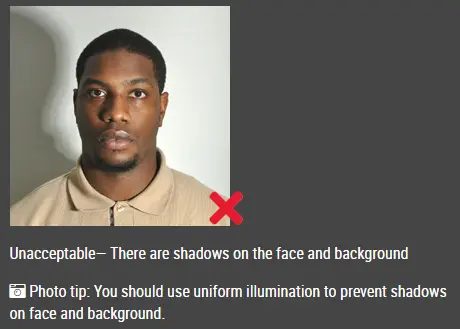
If one side of your face is darker, or there’s a shadow behind you, there’s a good chance your photo won’t be accepted.
What Are the Official Passport Photo Lighting Requirements?
Most countries follow similar rules when it comes to passport photo lighting requirements:
-
Your face must be evenly lit from both sides
-
There should be no shadows on your face or background
-
Lighting should be neutral (not too warm or too cool)
-
No glare, reflections, or bright spots
-
The background must be evenly lit and plain
Think of it as clean, flat lighting, nothing dramatic.
How to Get Good Passport Photo Lighting at Home?
1. Use Natural Light Whenever You Can
The easiest way to meet passport photo lighting requirements at home is to use daylight.
Just stand facing a window and let the light fall evenly across your face.
A few small tips:
-
Avoid direct sunlight, it’s too harsh
-
Morning or late afternoon light works best
-
Use a curtain to soften strong light if needed
This setup alone solves most lighting problems.
2. Get Your Position Right
Even with good lighting, positioning can make or break your photo.
-
Stand about 1 to 1.5 meters away from the wall
-
Face the light source directly
-
Keep your head straight and centered
Standing too close to the wall is a common mistake, it creates shadows behind your head.
3. Make Sure There Are No Shadows
Shadows are one of the main reasons passport photos get rejected.
Check for:
-
Shadows under your chin
-
Shadows on one side of your face
-
Shadows on the wall behind you
If you see any, adjust your position or add more light until everything looks evenly lit.
4. No Window? Use Two Lights
If you’re taking your photo at night or don’t have good daylight, you can still make it work.
-
Use two lights, placed on both sides of your face
-
Keep them at roughly a 45° angle
-
Use soft white bulbs (5000K–5500K)
Try to keep both lights equal so your face is evenly lit.
Common Passport Photo Lighting Mistakes
These are easy to avoid once you know them:
-
Using flash → creates harsh shadows and shiny skin
-
Light coming from behind → your face looks too dark
-
Uneven lighting → one side brighter than the other
-
Mixing different light colors → unnatural skin tone
If your photo looks uneven or “off,” it probably won’t pass.
Getting passport photo lighting right at home isn’t complicated, it just takes a bit of attention to detail. Stick to soft, even lighting, keep things simple, and take a few test shots.
Click here to make passport / visa photos
Other passport pictures guides
- Best Lighting for DV Lottery Photos: A Simple, Home-Friendly Guide
- How to Split Photos Like a Pro with IDPhotoDIY’s Free Image Splitter
- What disqualifies you from the DV lottery?
- What increases your chances of winning the DV lottery?
- What is the best time to apply for the DV lottery?
- Passport Photo Dress Code 2026